 | ||
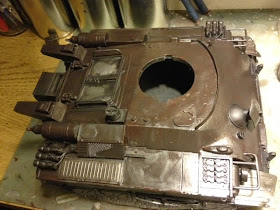
| texture with Tamiya putty |
And then I go to town laying it on....
And here is the result.
Now, for a bit of oxidation for the steel.
 |
| Mix of Gaia Oxide Red and Red Braun |
The paint and weathering scheme I'm going for is inspired by a Russian BMP-1
Chris Meddings posted on Face Book. I'm guessing the vehicle was painted green while it was part of the Soviet's arsenal. At some point it became property of Iraq and the green was painted over dessert yellow. I wanted a challenge and because this is such a big build with ample amount of surface to cover, I wanted to take a stab at chipping multiple layers for more visual interest.
These excellent photos were taken by Chris and can be found here. Thanks for the reference pics, Chris.
So, now for some green of course.
And per-weathering with Copic Markers and Tamiya thinner....
I've talked about pre-weathering before using oils. The step is to help give depth to the next coat. This time I'm using ink. I do this now in the process instead of at the end so the rust stain colour appear below the surface of the final layer of paint and not over it.
A quick video on application....
Results...
After pre-weathering, the entire build is covered with a coat of Mr Silicon Barrier and left to dry for approximately 8hrs. I've pained over it in shorter periods before, but find better results come after it has dried for more than two hours. This acts as a chipping "solution" for lacquer paints. The next coat of paint will be easily removed from the areas I want to show wear or chipping.
Top coat, next, is a custom mix of Gaia lacquer paints. I'm looking for a light greyish-blue so that it contrasts the green and metallic undercoats. I layer the paint on in very thin coats, building up the surface.
The first few coats.
I add ID decals at the point above so that I can paint into them while adding the final layers of the top coat as shown below.
While finishing of the last coats, I also do some colour modulating using the paints in the dish.
Stay tuned. More posts in the next few days.


